Sign in to Loot Audio
Access your downloads, purchases and more
Access your downloads, purchases and more

Pulse is a revolutionary new downloader offering blazing fast speeds and powerful control over your libraries. Loot Audio uses Pulse to power some of our downloads and to make managing your libraries more efficient for you.
After your purchase we will send you a unique code (you will also find the code in your account). Use the code with Pulse to power your download and installation. More information about Pulse can be found here.
What are Credits?
You earn Credits every time you purchase a product from Loot Audio. 3% of your order is added to your account in the form of Credits.
Use Credits for money off future orders or convert them to Sample Credits to download samples from the Sounds section of the site.
An experimental wavetable synthesizer for Kontakt


$37.00
Earn 87
Note: This product is compatible with Kontakt Full 6.6.1 and above







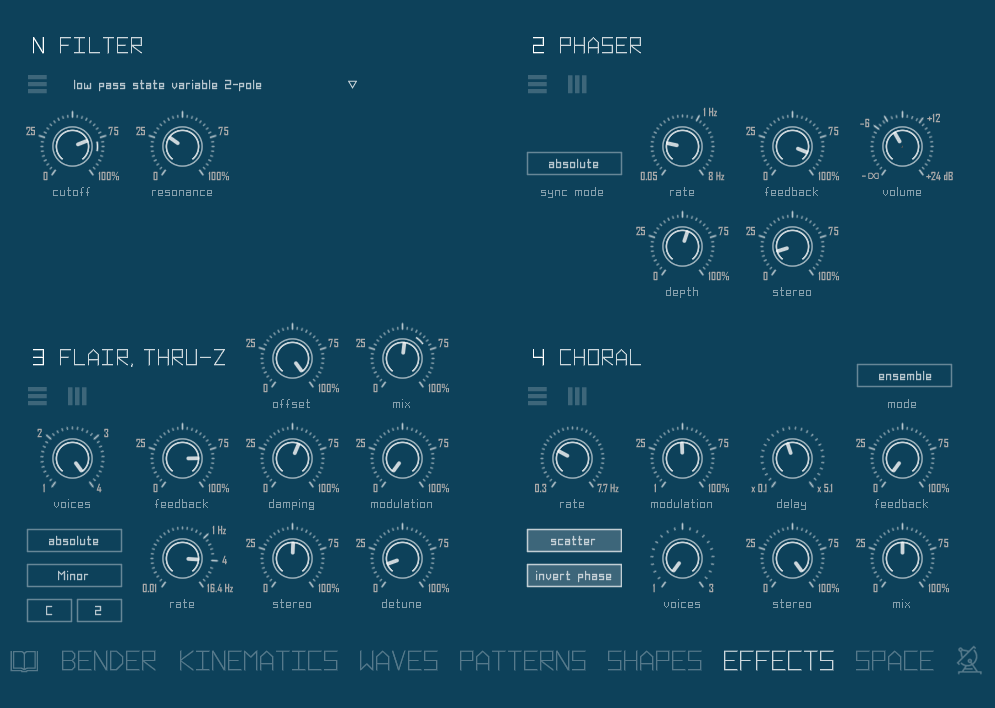
Branebender’s Effects page contains 4 insert slots. Which means that you can have up to four effects loaded at the same time. You can pick different effect types and different insert points, so any effect can be applied to a single oscillator or a group of oscillators.
Oscillators are routed through effect busses, initially each oscillator is assigned to a separate bus. Busses are named 1,2,3,4. So oscillator A goes to 1, B goes to 2 and so on. You can group
oscillators by assigning them to a single bus (look at the Waves page), then you can process a group of oscillators with a single effect, or one chain of effects.
Each of four effects can be assigned to any bus, additionally there are two post-bus insert points, named “N” and “M”. “N” (iNsert) which is located after summing of all busses, so it will apply to all busses (if you want the effect to work for all oscillators you can switch it to N, instead of routing oscillators to one bus). “M” (Master) is located at the end of chain, after N and after Space effects return. There are only two processors after M point, master filter (look at the Bender page) and Master Limiter (look at the Setup page).
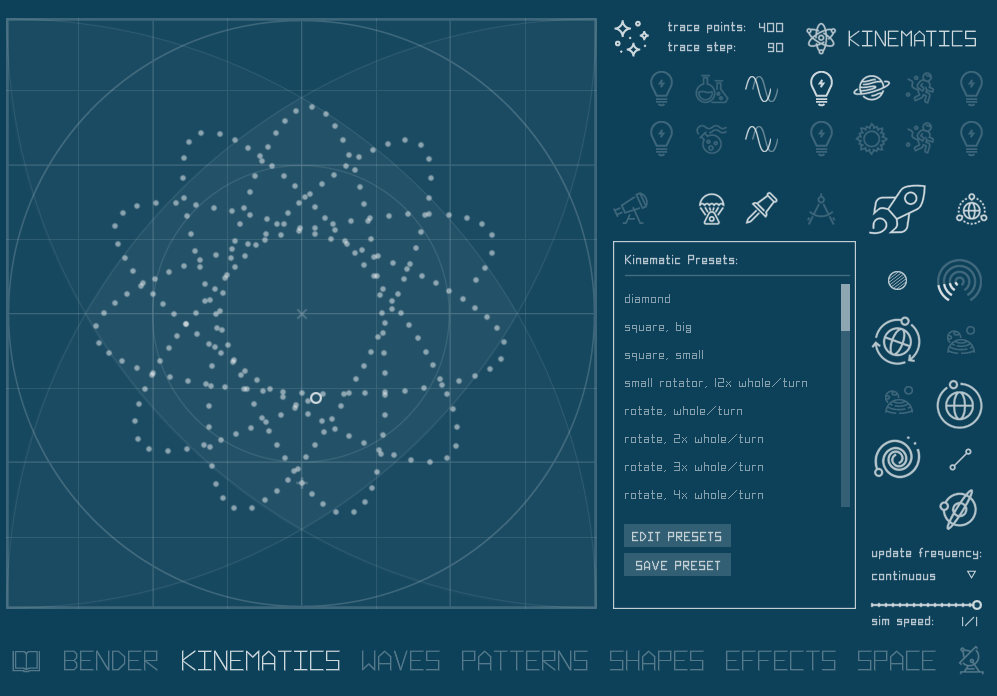
Kinematics is a kind of two dimensional particle movement simulation, which I designed to automate XY-pads / icon controllers. It is a part of the instrument that you can completely ignore, or only use presets, if you don’t want to dive into secrets of simulation programming. Or you can only use “draw by numbers” mode which is very simple to master.
You can run up to 6 simulations simultaneously. There are dedicated simulations for wavebender, volume mixer and both filters. Additionally there are two simulations which you can assign to any of remaining XY-pad controllers, namely: detune, filter LFO, panorama, waveshaper and waveform selection. Alternatively they can be used as a modulation source for the effects, which you can set on the Shapes page.
Once the Kinematics engine is activated and specific simulation is turned on, the automated icon will start to move on it’s own according to the simulation path.
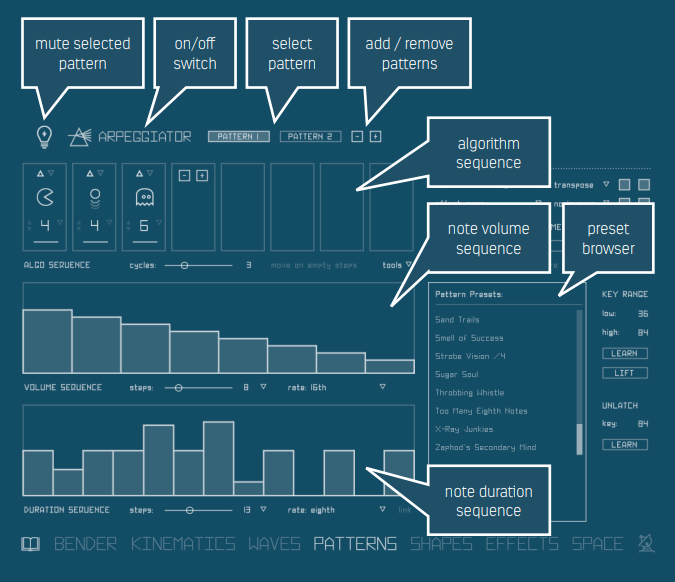
On the Patterns page you will find controllers for Branebender’s arpeggiator. It’s a different take on the arpeggiator idea, which was written specially for this instrument. It can run multiple arpeggio patterns at once (up to six). Each can have an entirely different set of parameters, like algorithm, rate or octave shift. Each pattern has volume sequence, note duration sequence and algorithm sequence.
There are three base algorithms, with up and down variants. You can sequence them within a pattern. For example play “up” for 8 steps and then play “down” for 4 steps. If you don’t want to explore ways of programming different patterns, you can simply use the provided presets. There are many to choose from. “/3” and “/4” suffixes in preset names are suggestions of how many notes in a chord to use with given preset.
Initially there is only one active pattern. You can add new patterns using “+” button next to “pattern 1” button. “-” button will remove the pattern with the highest number, or should I say, hide and disable it, as no data is being removed. If you remove a pattern and then press “+” it will reveal the removed pattern with all settings unchanged. To reset a pattern, use the “tools” menu.
The “Light bulb” button mutes the selected pattern, which may be useful to discover which pattern plays which sounds (it can get confusing with multiple patterns). The whole arpeggiator function can be turned on and off with the “arpeggiator” button.
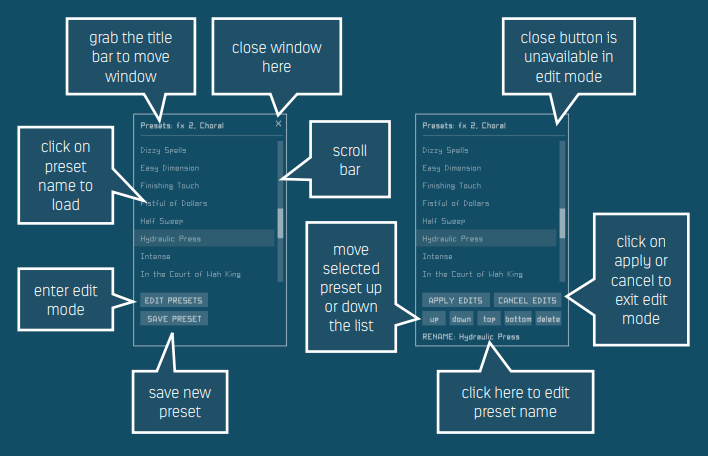
Branebender has a presets system which is used in different sections. There are presets for Kinematics, Patterns, most of the individual effects and Setup parameters. In the Kinematics and Patterns presets window is fixed in place and integrated into the UI. On the Effects and Setup pages you can invoke and close the preset window, also you can move it around the UI area, just grab the title bar.
You can save your own presets. Just click on “save preset” button. Then a text line will appear: “RENAME: Preset ...” with preset number. Click on “Preset ...” part to change preset name.
The Shapes section is Branebender’s modulation hub. Here you will find pitch and volume LFOs. Also there are four scripted LFOs and two step sequencers which you can assign to effects or key engine parameters (pitch and wave bending). You can also use two of the Kinematic simulations and aftertouch as modulation sources.
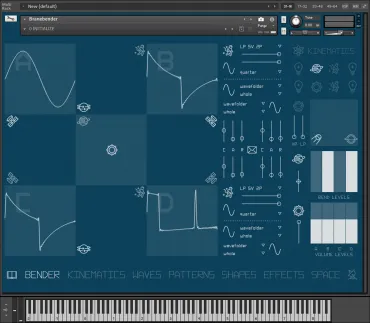
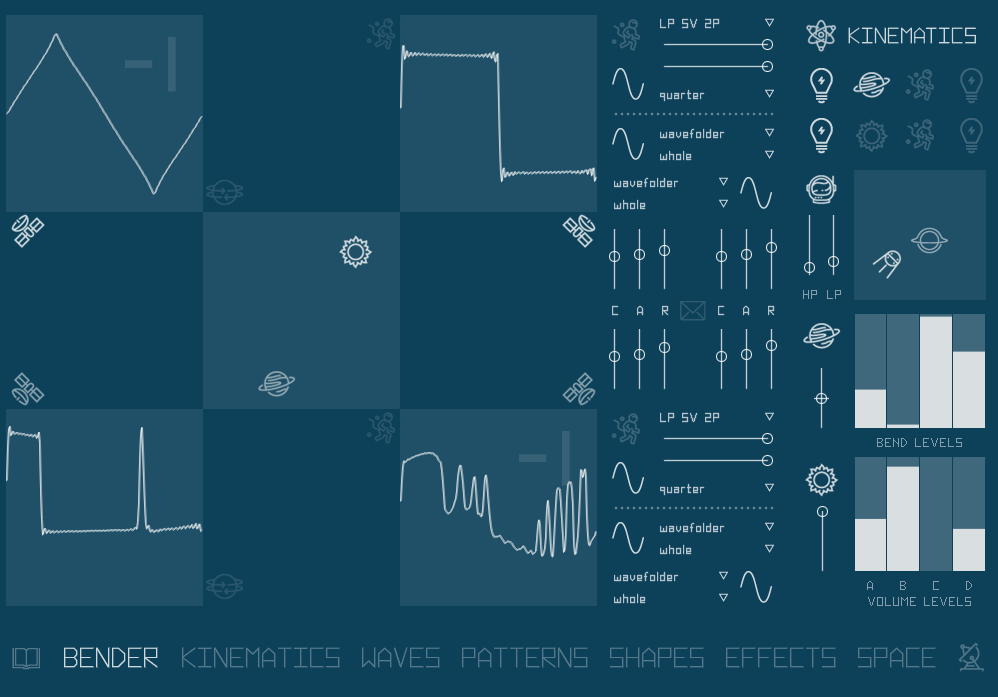
There are four wavetable oscillators in the instrument. Each wavetable is a transition between two waveforms. On the left side of bender page, you will find graphical representation of four waveforms and five XY pads that control key engine parameters. Pads can be automated using Kinematics animation.
Oscillators/waveforms are named A, B, C and D and will be referred to in such manner in the instrument. You can keep the oscillator letters on top of waveform graphic or hide them for a slicker look in Setup section: “show wave letters”, under “other settings”.
Move the “Saturn” icon in the central pad to control morph position between wavetable shapes. On the right side of the window you can see how the movement affects individual waveforms. Look at the set of vertical bars named “bend levels”. You can adjust the bars directly, but moving the pad icon will override that adjustment, unless you disable the pad controller using “Saturn” icon placed next to control bars. You can also use vertical slider under the icon to adjust pad behaviour.
In similar manner “Sun” icon controls oscillators volume levels. Closer the icon gets to given oscillator, the more prominent it becomes in the mix, while keeping overall loudness on the same level. So, as you move “Sun” icon around you “morph” the sound between different oscillators. Hold “control” key and click on the icon to reset it to default position, which is the centre of the pad area (this works for all pads). As for bend levels, you have set of bar controller for oscillators volume on the right side of the page. Also you can disable the icon or adjust it’s behaviour with the vertical slider (which adjusts it’s ‘strength’).
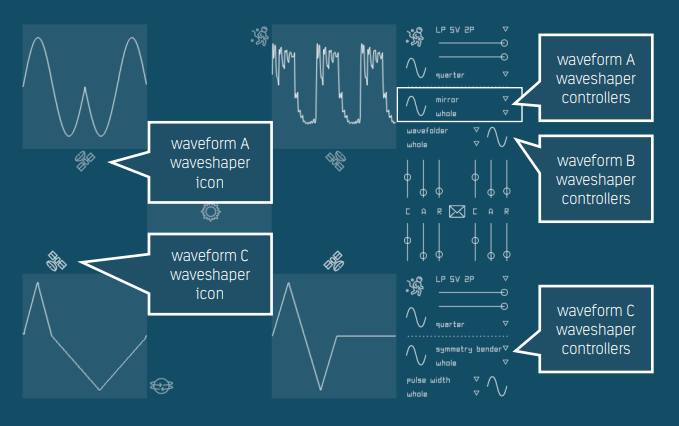
The Waves section is where you can assign wavetables to oscillators. Each wavetable is a transition between two waveforms. There are 16 base waveforms, in all combinations excluding repeating ones (like AB and BA), making 120 wavetables to choose from.
Waveforms with names starting with “digi” (digital) are software rendered, these are basic ones: sine, triangle, square. “Mini” indicates Minimoog waveforms, these were captured from analog synthesizers, not an actual vintage Moog, but a modular clone, these are: saw and blade. “Dixie” indicates captures from Intellijel analog oscillators from modular system. “Fuzzy rat” and “Bender” waveforms are captures from distortion effects, ProCo Rat and Tone Bender clones.
The Waveform selection controller is an XY pad, similar to those on Bender page. To select a waveform you need to click on an oscillator icon and drag it around over the list of wavetables. Graphically, the selection cursors reflect oscillator position on the Bender page. Cursors may overlap indicating multiple oscillators attached to the given wavetable.
4.0/5.0
(Average of 1 review)
Sort By:
The FULL version of Kontakt 6.6.1 or above is required to use Branebender. Please do not purchase if you only have Kontakt Player.
Download size is just 6MB (instant download as a zip file from your account after purchase)